In Lesson 1: 2D processing, display, and analysis, you will learn to process, display, and analyze 2D matrix files. The topics covered in this lesson are:
In Lesson 2: Analyzing Relaxation Data, you will learn to perform a relaxation analysis. The topics covered in this lesson are:
In this lesson you process a 2D matrix, display the spectrum using a variety of standard plotting methods, and assign the cross peaks. You start by processing a 2D matrix using the EZ macros. This lesson takes approximately 60 minutes to complete once you are comfortable with the procedures.
This lesson uses the 2D_tut tutorial data set. If you installed the gifts and tutorials, then you can find this data set in the $BIOSYM/tutorial/felix directory. If you did not install gifts and tutorials, then you can find this data set on the gifts and tutorials CD-ROM. Please copy these files to your working directory:
     2D_tut/1/ser

2D_tut/1/acqus

2D_tut/1/acqu2s
Since the FELIX program always expects to see the same directory structure on the machine where it is running as on the CD, create a pdata/1/ subdirectory within your working directory:
> mkdir pdata/1/
Now copy the following files to this subdirectory:
     2D_tut/1/pdata/1/procs

2D_tut/1/pdata/1/proc2s
It is easiest if you move the parent text window that FELIX was started from to a position below the FELIX window. As you work with FELIX, information will occasionally be output to this window. Thus you should make sure that you can see this diagnostic information.
Select the File/Open menu item. Enter ser as the Filename, set the File Type to Other Data, and then select OK.
This file is the first FID of the 2D HSQC spectrum collected on a Bruker spectrometer.
Select the Process1D/Window Function menu item. Select Sinebell^2 as the apodization function. In the next control panel, leave the default parameters (512 and 90.0) and select the Real-Time option for Method.
The FID is displayed along with the apodization function in red. You
may experiment with different settings of the wsize and wshift parameters.
The effect on the FID is displayed in real time.
The apodized FID is now displayed on the screen.
6. Phase-correcting the spectrum
Select the Process1D/Phase Correction menu item. In the control panel, select the Real-Time option for Method and select OK. When the real time phase interface appears, <Shift>-click (with the right mouse button) a peak in the small overview window, which you would like to use for zero-order phasing. Using the mouse, adjust the Phase0 parameter to phase this peak, then adjust the Phase1 parameter as necessary. Select OK when you are finished.
Now that you have a rough idea of the apodization and phase correction parameters, you can proceed with processing the D1(t2) dimension of the 2D data set.
7. Processing the D1 (t2) dimension of the 2D data set
Select the ProcessND/Open and Process 2D menu item. In the first control panel, select the previous ser file. In the next control panel, leave the header parameters at their default values (read from the spectrometer header files), except for these:
In the next control panel set the following parameter values:
In the next control panel, set the following parameter values:
When the Sinebell Parameters control panel appears, enter these values:
There is a slight delay as the bruker.mat matrix is built. The bruker.mat matrix is then opened
As the D1 transform proceeds, the current row numbers are shown in the text window. This step should take about 1-2 seconds.
After the first dimension is processed, FELIX shows the control panel for processing the second dimension.
8. Processing the D2 (t1) dimension
Set the following parameter values in the control panel:
In the Linear Prediction control panel, set these parameters:
In the Sinebell Parameters dialog box, set these parameters:
The column numbers of the D2 vectors are shown in the text window as the processing proceeds. This step should take less than one minute.
When processing completes, the matrix is closed. If you choose instead to display the matrix at completion, the matrix is left open, the contour threshold is calculated, and the matrix is then displayed.
Select the File/Open menu item. Select bruker.mat as the Selection, leave the other values set to their defaults, and select OK.
FELIX automatically calculates the plot levels. You can change them manually:
Select the Preference/Plot Parameters menu item. Set the following values:
Leave the other values set at their defaults and select Set.
The data are always read from the matrix, not from a graphics file, so that display parameters can be recalculated at any time. Hence, the graph is redrawn with each plot command.
At this point you could examine the D1 and D2 vectors in more detail to determine if further baseline correction or phasing adjustments are necessary.
Referencing of the matrix happens automatically, since the header parameters are read or adjusted during processing. You can further adjust the referencing, for example, by giving more descriptive names for the axis:
Select the Preference/Reference menu item. In the control panel, leave every parameter at its current value, except for these:
The 2D spectrum should now be redisplayed with the correct referencing for each axis.
12. Viewing an expanded-region contour plot
You can choose expanded regions with the cursor or by inputting numeric parameters:
When you release the mouse button, the region selected expands to fill
the window.The plot is still in intensity mode, hence the contour levels
are not shown.
The parameters in the control panel that appears are filled in with the values of the current plot.
Set these parameter values to expand the region:
You can save these parameters and reuse them for other plots, for example, if you were analyzing a series of spectra collected with different mixing times and always wanted to observe identical regions.
The 2D matrix is now plotted in contour mode, with a color-coded intensity scale.
13. Changing the 2D drawing parameters
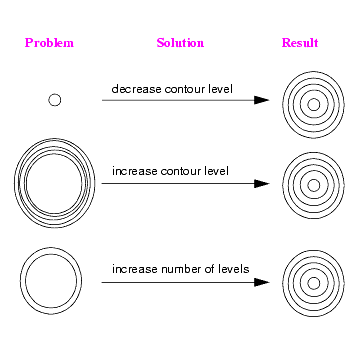
If no peaks are visible, try decreasing the contour level to cut lower into the spectrum. If the peaks are outlined but you do not see the circles shrinking to define the tops of the resonances, try increasing the level multiplier to increase the space between levels:
Select the Preference/Plot Parameters menu item. Click the Axis button. Set Grid Spacing to 3 and select OK.
Select the Preference/Plot Parameters menu item again. Click the Axis button. Set grid spacing to -6 and select OK.
Select the Preference/Plot Parameters menu item. Click the Axis button and then set Grid Spacing to 0 and select OK.
The selected region of the 2D spectrum is displayed as a stack plot.
16. Returning to the full spectrum
Select the View/Plottype/Intensity menu item to redraw the flat spectrum. Select the View/Limits/Full Limits menu item to return to the full spectrum.
Note: If you select Full Limits while in contour mode, the spectrum can take a long time to redraw. You can stop plotting by pressing <Ctrl>-c on your keyboard.
First you need to set the peak-picking parameters. Select the Peaks/Pick Region menu item. Leave the parameters at their default values, but set the Pick Region Mode to Define by Cursor. Select OK.
Red boxes appear around all cross peaks meeting the criteria defined in the control panel. After the peak picking is done, a spreadsheet appears, displaying all the peaks.
18. Deleting peaks and replacing them
Select the Peaks/Remove One menu item. The cursor becomes a +. Click one or two red boxes to remove them, then click in the empty space to the left of the frames to return to a normal cursor.
Select the Peaks/Pick One menu item and click to add individual peaks. Press <Esc> to return to a normal cursor.
Select the Peaks/Edit menu item to manually adjust the box defining a peak. Click in the center of any red box of a picked peak. The box becomes green. Click the center of the box and drag to move the entire box or click near a corner of the box and drag to resize it.
Select the View/Plot menu item to redraw the window (and clean up any broken lines or other details).
Execute the Tools/List/List 1 menu item to select the first list. Then select the Tool/List/Select Displayed menu item.
All the selected peaks from the peak-picking are colored with green boxes.
A summary of the current peaks in this list appears in a spreadsheet that you can edit.
The boxes surrounding the deselected peaks become red.There are now two or three fewer peaks in the list, corresponding to the peaks you have just deselected.
Select the Measure/Name One Peak menu item and click one of the red boxes.
Set the following parameters to assign the resonance:
Select OK, then press the <Escape> key to return to a normal cursor.
You do not need to assign the peak in both dimensions. You can label the cross peaks in one dimension at a time, as the assignment is made. This is usually how assignments are observed.
If you want to use the restraints list directly in the Insight II or Discover program, you have to use the Insight II proton names as the peak names. At the moment there is no check of atom names, so you may enter anything you want.
Select the Peaks/Find menu item, select Find Peak By Name and set the Action to Color. Set the Peak Name D1 to h1 and Peak Name D2 to *. Select Yellow for Color. Select OK.
The assignment list is searched, and the boxes surrounding all peaks with a label of h1 in D1 dimension are colored yellow.
To calculate the volumes of the picked peaks, select the Measure/Integral/Volume menu item. In the control panel, select the Measure All Volume options for Action. In the next control panel, leave the Peak and Volume set at their defaults. Set Volume Slot Number to 1 and Mixing Time to 0.1. Select OK.
In the Building New Volume Entity control panel that appears, set Total Mixing Time Slots to 6 and select OK.
You can now view the volume data with the Edit/Table menu item (selecting the vol:volumes entity) or write the volume data to a file with the File/Export/Table menu item.
To calculate restraints from these volumes based on the two-spin approximation, you must open or create a scalar entity for the database, define a scalar pair, create the restraints (strong-medium-weak, or any other listed choice), and write the restraints file. The appropriate commands are in the Measure menu.
In this lesson you learn to perform a relaxation analysis based on analyzing heteronuclear relaxation data. It is assumed that R1, R2, and heteronuclear NOE were measured as a series of 2D HSQC (or equivalent) spectra. The data used are parts of the relevant spectra acquired for apocalbindin D9k (Akke et al. 1993).
The following files from the $BIOSYM/tutorial/felix directory are required for this lesson. Please copy these files to your working directory:
     t1_1.mat

t1_1b.mat

t1_2.mat

t1_3.mat

t1_4.mat

t1_5.mat

t1_6.mat

t1_7.mat

t2_1.mat

t2_1b.mat

t2_2.mat

t2_3.mat

t2_4.mat

t2_5.mat

t2_6.mat

t2_7.mat

noe1.mat

noe2.mat

noe3.mat

noe4.mat

relax.dba
Enter felix at the system prompt to start the program. If the RESTORE LAST SESSION dialog box is displayed, select CANCEL.
Select File/Open. Set FileType to DBA if necessary, then select the relax.dba file from the Files list and select OK.
Detach the Relaxation menu from the menu bar by selecting the Measure/Relaxation/-------- menu item from the topmost row in the pullright menu.
4. Measure peak heights in the R1 series of spectra
Select the Measure Heights/Volumes... menu item from the Relaxation menu. In the control panel, set these values:
In the next control panel, FELIX asks for the first spectrum in the series and some parameters.
Select the t1_1.mat matrix and set these values:
FELIX now plots the spectrum, repositions the peaks to their exact centers. and calculates the peak heights.
When the spectrum selection control panel appears again, you need to specify file names and parameters for the remaining spectra in the same way as you did above.
Enter the following values (in this sequence):
To view the volume table, select the Edit/Table... menu item from the FELIX menubar and double-click vol and t1, respectively.
You will find the relaxation delays in the last row of the table.
5. Evaluate the signal/noise ratio for the peak heights
Select the Signal/Noise Ratio... item in the Relaxation menu. In the control panel, enter:
FELIX calculates the peak heights in this duplicate spectrum, calculates the average height difference between this spectrum and its twin spectrum, and derives the uncertainty of the volume determination.
These values are reported in the text window. If you have more than one duplicate time point in your relaxation series, the uncertainties for the other time points are interpolated or extrapolated. For a single duplicate measurement, the uncertainties are simply promoted to the other points.
To view the S/N table, select the Edit/Table... item from the FELIX menubar and double-click vol and t1s, respectively.
You will find the uncertainties in the last row of the table.
Select View Timecourse via Cursor in the Relaxation menu and then click a peak in the displayed spectrum.
FELIX plots a graph of the peak height vs. relaxation delay, including error bars. Due to the good S/N in the spectra, the error bars may not be immediately apparent.
To view a time course by entering a peak number, select View Timecourse via Item in the Relaxation menu and enter a number in the dialog box.
FELIX displays the corresponding time course or informs you that no such peak number exists and lets you try again.
To print the plot use the FELIX printing function (either click the Printer icon or select the File/Print... menu item).
FELIX uses data from the currently active tables to display the time courses. If you want to view data from different tables, use the Preference/Table... menu item to assign another relaxation table.
7. Fit R1 values to the time courses
Select the Fit R1/R2/NOE item in the Relaxation menu. In the control panel, select Fit R1 Timecourse and select OK.
FELIX now fits the time course data to the exponential function:
| Eq. 1 |
|
and derives the relaxation rate R1 from the coefficient a2 in the exponent. The relaxation rate R1, its standard deviation, and the c2 value for each fit are reported in the text window.
The relaxation rate R1 and the raw coefficients for the offset a0 and linear term a1 in the function, along with their standard deviations are stored in the table rel:r1. In addition, the c2 value of the fit is stored for each time course.
To view the rel:r1 table select the Edit/Table... item from the FELIX menubar and double click rel and r1, respectively.
If you now view a time course, FELIX plots the fitted function in red, along with the experimental peak heights. This lets you visually judge the quality of the fit. You can print the plot by clicking the printer icon.
To evaluate R2 data repeat Steps 4 through 7 with these values:
The t2_1b.mat is a duplicate spectrum. R2 time courses are fitted to the simple exponential function:
| Eq. 2 |
|
and the general exponential function:
| Eq. 3 |
|
Whichever function yields the lower c2 value is used to derive the R2 relaxation rate. FELIX reports the R2 value, its standard deviation, and the c2 value in the text window and also tells you which function was used.
All the fitted values are stored in the table rel:r2, analogous to the R1 data (see Step 7).
9. Evaluate heteronuclear NOE's
Select the Fit R1/R2/NOE menu item on the Relaxation menu. Select Evaluate NOE in the control panel and select OK.
In the next control panel enter:
FELIX plots the first spectrum, repositions peaks to their exact centers,
and measures peak heights. Then it plots the second spectrum and measures
peak heights.
In the sixth control panel, select noe4.mat as the duplicate spectrum with 1H saturation and select OK.
In the seventh control panel, select noe3.mat as the duplicate spectrum without 1H saturation and select OK.
FELIX plots the first duplicate spectrum, repositions peaks to their exact centers, and measures peak heights. Then it plots the second spectrum and measures peak heights. Finally it reports the NOE's and their standard deviations to the text window and stores them in the table rel:noe.
To view the rel:noe table, select the Edit/Table item from the FELIX menubar and double-click rel and noe, respectively.
Once you have all R1, R2, and NOE values evaluated and stored in the
database, you can generate an input file for the Modelfree program (A.
G. Palmer, Columbia University, http://www.hhmi.columbia.edu/
palmer/).
Select Modelfree Input from the Relaxation menu. Enter the following values in the control panel:
Now you have initial input files for the tmest and Modelfree programs. For more information about working with Modelfree, please refer to its documentation and to the scientific literature.